
Back on Kubernetes with k3os
- Former coworker started new job where he needs to learn kubernetes things.
- I hadn’t done stuff with kubernetes in a while and I didn’t want to forget it.
- Bored with single-node Docker.


Passbolt installed via Docker. Need to get my passwords in order. passbolt.travnewmatic.com
nvm, no mobile client 🙁 but its on their to-do.
Because its super fun and super educational! It teaches you a little bit about a lot of different things. It also paves the way for taking back control of your own data, by hosting the services you use on your own equipment. Lets get started!
Something can be literally anything that can run Linux. Ideally, that something should have an Ethernet port, but that’s not absolutely required. Old laptops are great because they’re small, quiet, and don’t consume much power. Starting out, specs aren’t so important.
Headless (no desktop) is best, but if you’re not super comfortable with only having the command-line available, install with a desktop. It is also possible to install with a desktop, but disable the desktop at startup. This way, you have a desktop available when you need it, but its not consuming resources when you dont.
I’m partial to Ubuntu, especially for those starting out because of the wealth of documentation available for doing various things.
At a minimum, I usually start with SSH (default port 22) so I can conveniently access my server remotely, either from within my home network or elsewhere. To increase security, disable root login via ssh, and disable password auth for all users (only allow key-based auth). Otherwise use a strong password for your non-root user.
Once you have your base system installed, note your IP address assigned to you by your DHCP server. Ideally, your server should be connected directly to the modem provided by your ISP.
For this you will need access to the web configurator interface for your cable/DSL/whatever modem provided by your ISP. If you do not know the username and password of your modem’s web interface, try searching online for “<modem model number> <ISP name> username/password.” Usually these are generic across all modem models provided by your ISP, but not always. If not, you may need to call your ISP to get your credentials.
Port-forwarding will allow traffic coming to your IP to get sent to your new server. Sometimes this feature is called port-forwarding, sometimes it is called virtual servers. The name can vary by device manufacturer. If you are unsure about how to configure this feature, run a search query like “<your modem model number> <your isp> port forwarding” and you should be able to find what you need.
To configure port forwarding, you’ll need the inside port, the outside port, protocol (TCP, UDP, or both), and the internal IP of your server. In the case of SSH, the default port is 22. HTTP is 80, and HTTPS is 443.
I do NOT recommend setting your new Linux server as the default host or DMZ. Only forward the ports you want exposed.
I also recommend configuring DHCP reservations. A DHCP reservation causes your DHCP server to always give the same IP to your Linux server. This prevents the problem of your Linux server getting a different IP and breaking port-forwarding.
Alternatively, you may setup a static IP on your Linux server. If you do this, be sure to set the IP to an address outside of the range of IPs the DHCP server is assigning from.
Assuming your residential IP is like most residential IPs, the IP assigned to your modem will change periodically. Normally this is not a problem because normally, you just need to get from inside your LAN to the rest of the public Internet.
This presents a problem if you’re trying to go the other direction, that is, accessing your new Linux server inside your LAN from somewhere outside on the public Internet.
You could pay for a static IP, but thats a bit unnecessary when there are plenty of free dynamic DNS options available.
Dynamic DNS works by some agent running somewhere inside your network reporting the public IP of your modem back to some DNS service and updating an A record (an A record is a resource record associating some domain to an IP). As long as everything is working correctly, your dynamic DNS domain will always be pointing to whatever IP your modem has and you can always hit your residential IP.
I personally use No-IP. afraid.org is another popular option, as is DynDNS. Agent setup is usually very simple.
Now it’s time for us to test traffic flow to make sure we can actually hit our server from the outside.
Assuming you setup ssh as your first service, try to ssh to your server using your dynamic DNS domain as the host. If you get a login prompt, congratulations! You did it!
If not, don’t fret. Go through the steps again and double check your port-forwarding settings.
If all your port-forwarding configuration looks good, check the ssh service.
If ssh is running properly, then test to make sure that your dynamic DNS service is working.
I highly recommend using your own domain with your services running on your server. You can accomplish this by creating CNAME records under your own domain pointing to the A record provided by your dynamic DNS service.
When I first setup my residential server in Taiwan, I created the dynamic DNS domain “keelung1.ddns.net.” While I already had my own domain, travnewmatic.com, I did not initially use it with my apartment server in Keelung. Instead, I added services as subdirs after keelung1.ddns.net (keelung1.ddns.net/wordpress, keelung1.ddns.net/plex, keelung1.ddns.net/mastodon, etc). This is a BIG PAIN IN THE BUTT because it requires a LOT of messy configuration with the webserver (nginx, apache, etc). Some web applications really don’t like to be served out of a path like that.
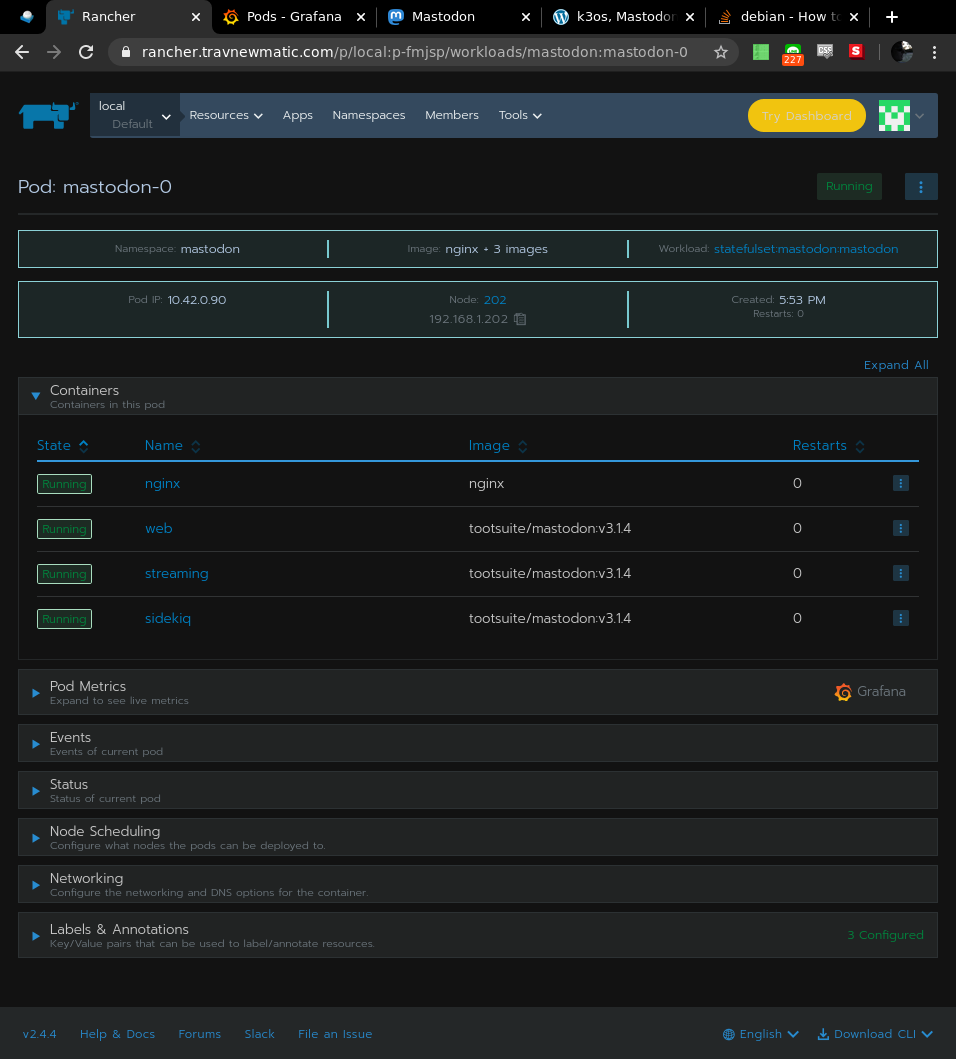
A MUCH EASIER method is to create CNAME records for each of your services. Currently I’m running a Mastodon instance in my apartment. Its domain is nangang.travnewmatic.com. That record is a CNAME pointing to my dynamic DNS A record keelung1.ddns.net.
You do not have to do this starting out, but as your collection of services hosted in your residence grows, creating subdomains for each of your webservices makes life WAY EASIER.
Think about what services you use on a regular basis. I’m particularly fond of RSS. One of my most heavily used self-hosted services is FreshRSS. Nextcloud is a very popular self-hosted web application. It provides features similar to Dropbox, as well some groupware features. You may be surprised how many quality, self-hosted, alternatives there are for the services you currently use.
Email is not something you can, or want, to self-host out of a residential IP. Email is ridiculously complicated and most major email providers (Gmail, Yahoo!, etc.) block email traffic from residential IPs because they’re so often the source of spam. If you would like to provide some sort of messaging service, I recommend something like XMPP/Jabber, Matrix, Mattermost, or RocketChat.
Optional, but screw it, go all in. This is going to be a fairly ‘Rancher-oriented’ affair. RancherOS is a Linux distribution made to run Docker.
RancherOS doesn’t have a wizard like other Linux install media. Instead, you boot into it, and run a command to install to a block device. That command needs a cloud-config.yml thing. You can put a lot of things in there, but for my purposes, I just put my SSH key, and a static IP config. I also switch the console to the ‘ubuntu’ console, as I find it to be more comfortable than the default.
The install guide mentions that you could have your cloud-config.yml at some URL, but I just put a second USB stick in the thing I’m installing on. One USB thing is the RancherOS live media, the other is a USB thing with my cloud-config.yml. I boot into the live environment, mount my USB with cloud-config.yml somewhere, and run the install.
This is definitely one of my new favorite things. Follow the instructions, run the little wizard thing, adjust it as you need to, and fire away.
I’ve switched my stuff from Ubuntu to RancherOS, but RKE doesn’t care. It just needs whatever minimum version of Docker to be running, and that’s it. rke up, wait a little bit, and you’ll have yourself a functional cluster. I haven’t had any problems with it, and I’ve done many rounds of rke up and rke remove (cluster creation, cluster removal). It even has the ability to SSH through a bastion host to your cluster nodes.
Pro tip: don’t mess with “cluster_domain:”. I thought I was gonna be cute and set my cluster domain to ‘travnewmatic.com’. That was a bad idea and led to A LOT of frustration with DNS and cert-manager/letsencrypt stuff.
Only change what you need to in that cluster.yml. The only special stuff I have in my cluster.yml has to do with the nodes: section at the beginning, otherwise everything is default from the config generator wizard thing.
Learn from my mistakes: if you use rke to create a cluster, and your cluster isn’t behaving right when you’re trying to do stuff with it later, tear your cluster down and make a new cluster.yml, get it back to as vanilla as possible, then test again.
Ubuntu note: when I was using rke to create a node on some ubuntu hosts, I ran into a problem with a particular setting in /etc/sysctl.conf. To change temporarily, run
sysctl net.ipv4.conf.all.rp_filter=0Add this line in /etc/sysctl.conf to make the change persistent across reboots:
net.ipv4.conf.all.rp_filter=0The default setting, whatever it was, caused problems with some network thing in kubernetes. I looked at the logs for that container to see why it wasn’t coming up, and the error made specific reference to that sysctl setting. I did not need to make this change when creating nodes running RancherOS.
kubectl is the CLI utility used to interact with your kubernetes cluster. I have kubectl installed on a desktop in my apartment (not one of the kubernetes nodes, though it could be). Once kubectl is installed, copy the kube_config_cluster.yml generated by rke to ~/.kube/config. Assuming everything is alright you should be able to issue commands like ‘kubectl get all’ and get something back from your newly minted kubernetes cluster.
BONUS: kubectl autocomplete! Very handy.
| kubernetes | ubuntu |
| helm | apt |
| charts | packages |
You get the idea. Helm is a way of deploying (I think that’s the right word) multi-resource applications. I think its quite powerful. I haven’t spent a whole lot of time with it, but it is a good thing to have setup. It doesn’t come with kubernetes, but I’d wager that everyone using kubernetes is using helm to some degree.
HELM JUST HAD AN UPDATE. A lot of the examples you see in guides use the old version and will throw some kind of error if you copy-paste using the new version. Not a huge deal. Keep banging on it, and it will eventually work. See the FAQ for some of the changes.
cert-manager provides automatic letsEncrypt functionality, and is a dependency for Rancher. This is easy to setup, via helm or manifest. The instructions on the website are sufficient. I made a script to do it for me:
#!/bin/bash
kubectl apply --validate=false -f https://raw.githubusercontent.com/jetstack/cert-manager/release-0.12/deploy/manifests/00-crds.yaml
kubectl create namespace cert-manager
helm repo add jetstack https://charts.jetstack.io
helm repo update
helm install cert-manager --namespace cert-manager --version v0.12.0 jetstack/cert-manager
I still have more to learn about how to do things with cert-manager. The instructions are reasonably clear, though I am not 100% confident in my cert-manager abilities yet. I recommend installing cert-manager, and running through the tutorials/examples to get a feel for it.
At first, I made a Rancher container, and then used that to make a cluster, but that’s weak not HA. A better method is to install Rancher INTO your kubernetes cluster. The instructions on the website work BUT THERE IS CURRENTLY A BUG with the ‘latest’ Rancher version with regards to how it interacts with cert-manager. I needed to specify –version v2.3.4-rc7 when installing from helm. This worked for me:
#!/bin/bash
helm repo add rancher-latest https://releases.rancher.com/server-charts/latest
helm repo update
kubectl create namespace cattle-system
helm install rancher rancher-latest/rancher \
  --version v2.3.4-rc7 \
  --namespace cattle-system \
  --set hostname=rancher.urdomain.here \
  --set ingress.tls.source=letsEncrypt \
  --set [email protected]
Adjust the –set hostname= and –set letsEncrypt.email= fields to your desired rancher domain and email respectively.
Wait a while for everything to come up and go to https://rancher.urdomain.here to use your new HA Rancher install!
Kubernetes facilitates the creation of a compute resource from separate nodes, but it doesn’t do the same for storage. That’s where software defined storage options like Longhorn come in. Longhorn is still a developing project, but it does work. It lets you combine storage across nodes into one giant pool. It also has backup and restore functionality, as well as the ability to replicate your data across multiple physical disks for durability. I haven’t played with this much other than installation and throwing disks at it, but its very easy to get off the ground. Currently it only supports ext4 and xfs filesystems.
RancherOS currently does not include open-iscsi which is required by Longhorn. Enable and start the open-iscsi service on RancherOS with the following:
ros service enable open-iscsi

ros service up open-iscsiThis has been a SUPER EXCITING past few days. I’ve learned how to:
My reference material has mainly been the official documentation for the various projects (kubernetes, rancher, kubectl, helm, and cert-manager). I got help with the cluster domain problem in the cert-manager slack channel. The next issue I ran into was that problem with Rancher working with cert-manager. Googled a bit, found issues (here and here) on github similar to what I was experiencing, used a solution described there, and it worked. I suspect that fairly soon the latest rancher version will work fine with the latest cert-manager version, it just isn’t this week in January 2020.
While my trajectory hasn’t been a perfectly straight line, I am very satisfied with the progress I’ve made over the past week or so. I’ve joined the Kubernetes and Rancher slack things:
They’re not official support channels, so be friendly. It might take a while for someone to respond.
Planning to churn through the Kubernetes lessons on Katacoda and whatever else I can get my hands on. Making a giant distributed computing thing out of crap laying around my apartment is really, really fun.
After ages musing about learning Docker, I have finally made the switch, and now I can never go back. I’d previously played with Docker on some of my Raspberry Pi 3’s and a surplus laptop, but I wasn’t happy with the pace of my learning. I figured that the best way to learn Docker quickly was to nuke my existing setup so that I’d have no choice but to rebuild.
I backed up the data for my most important services, namely Mastodon and Synapse, and ferried it off of the apartment server. Reformatted and installed the most recent Ubuntu LTS, which happened to be 19.04 Disco. Then, I installed the usual No-IP update client so I could reliably SSH in from outside. Installed Docker via the convenience script, and I was off to the races.
Tiny Tiny RSS had been a favorite of mine for a long time, and its something that I used regularly. Also, its reasonably simple: PHP stuff, a database, a webserver, and a daemon that periodically scrapes feeds for new articles. Its utility and simplicity made it a good first Docker project. After some searching around, I landed on a now removed tt-rss image from linuxserver.io. It was a great first success. This provided good experience with docker commands and docker-compose syntax. Recently, it seems that there was a bit of drama between the tt-rss maintainer and the linuxserver.io people, and the tt-rss image has been removed from docker hub. As there is no official tt-rss image, and the docker solution that is provided is a bit messy and involves building an image, I’ve switched to FreshRSS. It has a nearly perfect-for-me docker-compose.yml that took just a few minutes to get running. Highly recommended.
Early on I adopted traefik as a reverse proxy to handle incoming connections to my containers. The timing was a bit interesting, as traefik v2 had just been released, and most of the examples online used the old v1 configuration. For my simple purposes, the tutorial and the Let’s Encrypt guide were enough to get me going.
I also knew that I should be managing stuff in a git repo. I’d looked at GitLab, tried to set it up a few times, and was unsuccessful. I eventually settled on Gitea. Gitea is similar to tt-rss in terms of complexity. Gitea was easy to get going, and also provided an opportunity to become familiar with version control (other than just ‘git clone’). All of my dockerized services are in Gitea repositories. I guess every professional programmer is already familiar with version control, but as I’m not a developer by trade, I’m only now realizing its benefits. Along with managing changes to code, I also like that I can leave notes (open issues) with myself. Having a place to chronicle and document my services has been so wonderful.
Watchtower is a thing to automatically keep your containers up to date. Watchtower periodically checks for new versions of the image your containers are using, downloads the new image, and restarts your container using the new image. There are some risks associated with having your containers update automatically, but this gets into the ‘art’ of doing docker things. From what I’ve read, if stability is more important than newness, don’t use the ‘latest’ image tag. Use the image tagged with the specific version of the software you want, that way you wont be surprised when a new ‘latest’ comes out and your configuration doesn’t work and all of your sites go down (see: traefik v2 release). In my configurations, I sometimes specify a version, in others I do not. I like to live on the edge, and I’m the only one that uses the services on my server. So far, no surprises.. yet.
Portainer is a web interface to manage your docker hosts. It can manage images, containers, volumes, and networks. It can also show graphs of CPU, RAM, and network usage. Everything you would do with docker commands and docker-compose can be done using the Portainer interface. Currently, I have Portainer running on my apartment server, but I’ve exposed the docker API on my Dallas server (following this guide). This way, I can manage multiple docker hosts from a single interface. While it is possible to use Portainer to create multi-container services (stacks), I prefer to write docker-compose.yml files because they can be managed in version control.
If I am setting up services for myself, there is no going back. Everything is tidier and easier to manage. Services are isolated in their own network. Configurations are managed in version control. The difference is night and day. I had grown restless with my apartment server. It was doing everything I needed, but after a while I was too afraid to do anything with it because I’d forgotten how anything worked. This new combination of docker and version control has given me more confidence to manage my server. The problem of “how the hell did I do that” when troubleshooting an old service has largely been alleviated.
I believe that I was able to become familiar with docker reasonably quickly because I’d already spent so much time doing things “the old way.” It feels like docker provides layer of abstraction over the usual administration of services. I was already familiar with how these services are supposed to be setup, I just needed to learn how make docker do it. I already know wordpress needs the php source, a webserver, something to process the php, and a database. That part wasn’t new. It was just the docker bits that were new. Previous knowledge accelerated the process immensely.
If you haven’t taken the docker plunge, do it now. If you want to learn quickly, start by tearing down what you have so you have to rebuild. Start with a simple service you use regularly. Take time, bang on it, and eventually you’ll get it.

Based on this excellent guide.
WARNING: You’re going to be messing with hard drives. You’ll probably be doing most of this as root. As the old adage goes, “The good thing about Linux is that it does exactly what you tell it to do. The bad thing about Linux is that it does exactly what you tell it to do.” I strongly recommend you to disconnect/remove drives you don’t want touched during this procedure so you don’t inadvertently wipe a disk you don’t want wiped.
Note: at the time of this writing, KDE Neon is based on Ubuntu 16.04 Xenial.
The whole process looks something like this: